Editing Lesson Content
To edit a lesson, open it in under the instructor view. You can do this by clicking on it on the course modules page in instructor view or by clicking on it in the main navigation bar's modules view.
You will be sent to the lesson editing page. Here, you can create a lesson using the rich text editor HiTA provides. It works like a normal text editor, but it has special nodes that you can insert into it and AI assisted content generation for helping you write your lesson.
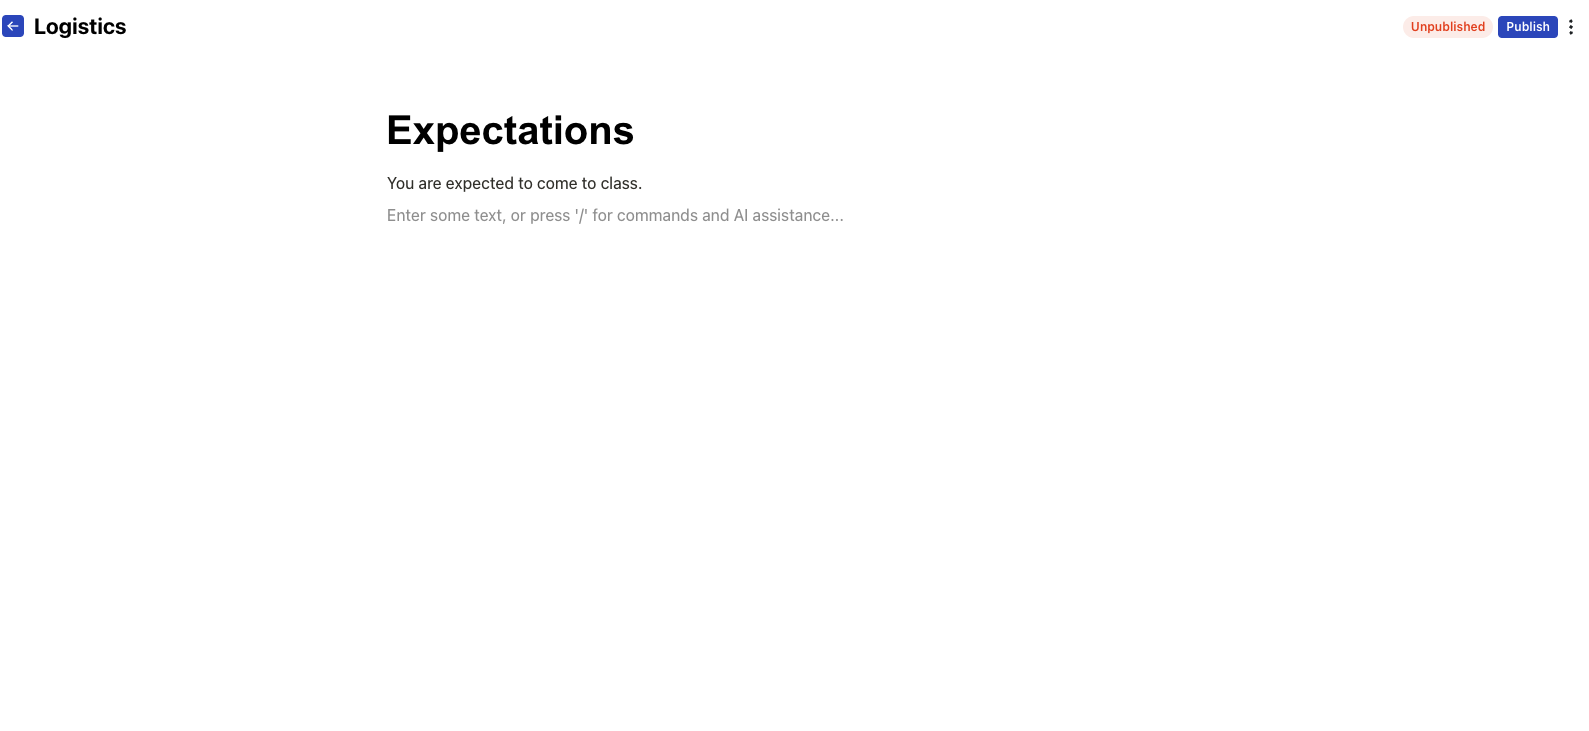
The lesson editing screen when a lesson is opened in edit mode with the rich text editor.
Editor Basics
You can type in this editor like you would any rich text editor. Your changes will be automatically saved as you edit the lesson. New changes are not visible to students until you publish them (this is indicated by the Unpublished badge that appears in the toolbar).
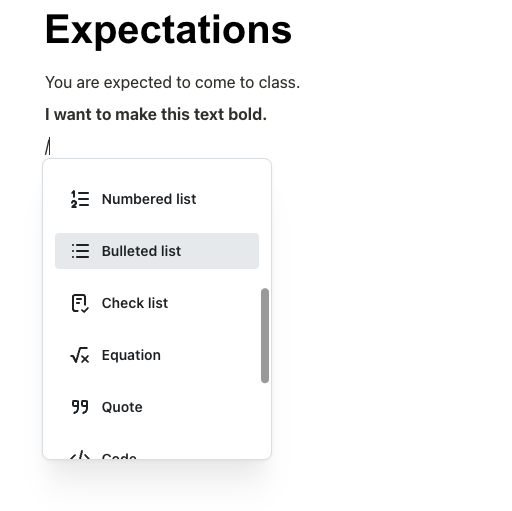
To format your text, you can highlight the text you type, and a formatting toolbar will appear. You can also use many common text editor shortcuts.

The common text formatting options are contained in the toolbar that appears when you highlight text.
The triple-dot menu contains options to change the font style of the lesson and to edit the metadata of the lesson. When you finish your edits, you can press Done to have them saved (this does not publish your lesson content). To publish your lesson content, press the publish button.
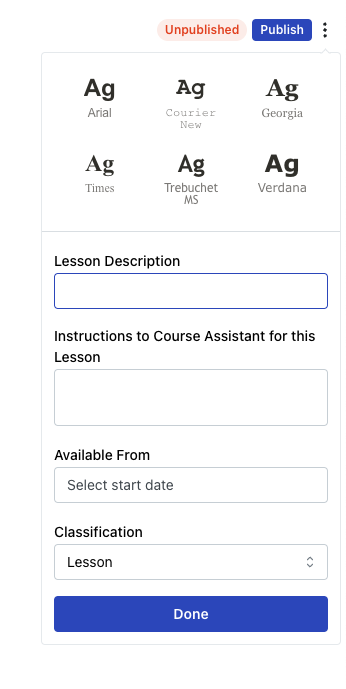
The publish button is located in the upper-right corner and will be available if you have unsaved changes. You can also edit the lesson metadata via the menu accessible from the triple dots.
HiTA will begin processing the lesson and embedding it into its knowledge base for the course. Once the check mark appears, the latest changes will be present in the knowledge base for the assistant to use.

This icon can also indicate that the lesson is still processing.
Editor Nodes
HiTA's editor allows you to insert special items into it. To do this, type /
in an empty line of the editor to bring up the editor nodes menu. It contains a
variety of different nodes that you can insert into the lesson.
The different nodes that can be inserted into the lesson.
What follows are are details on just some of kinds of nodes that can be inserted into a lesson, including PDFs and images among other options. The content of these nodes will be embedded into the lesson and understood by the TA.
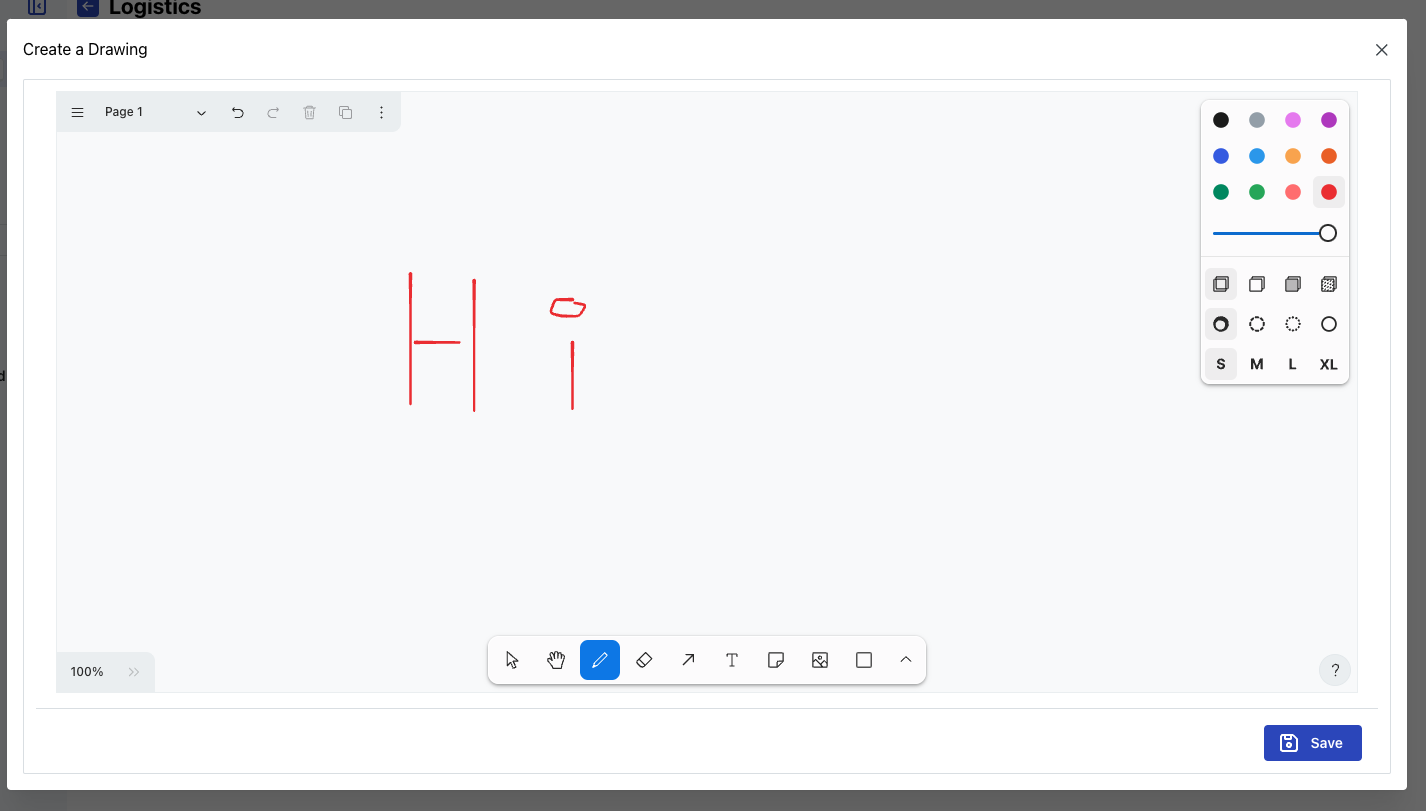
Whiteboard
You can insert a manually drawn image into your editor with the Whiteboard node.
PDF
Click the PDF option to upload a PDF. It will be embedded directly into the lesson. Note that there is a size limit on the total size of the entire lesson, so you cannot upload multiple 50MB PDFs into the same lesson, for instance. The size of all content in the lesson should roughly be under 50MB.
Images
Clicking the image button lets you insert an image into the lesson. An AI-generated description of the image will be embedded into the knowledge base.
Equations
Clicking the equation option allows you to use LaTeX to insert an equation into the lesson.
AI Assisted Lesson Generation
Within the node insertion menu is an option to have the AI help you write a lesson using materials in the course.
When you select the option, you will be asked to give the AI a statement of what you want in addition to being allowed to select resources that the AI can use while generating your content. When selecting resources, you must press done to submit your choices to the AI.
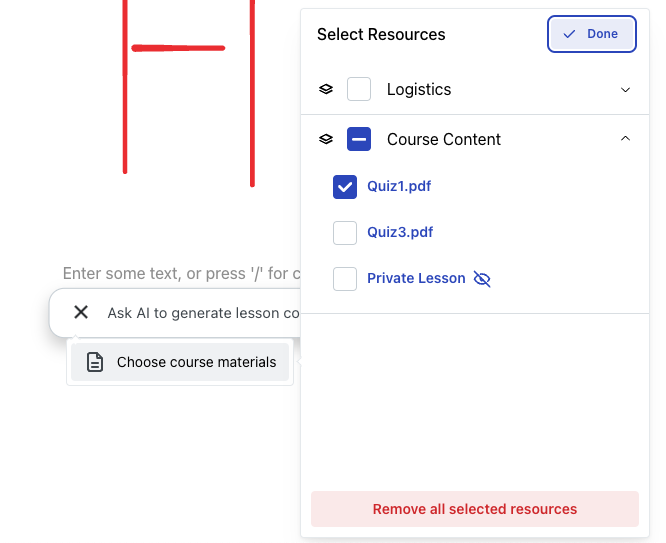
The AI generation resource selection dialogue box. You must press Done when selecting resources to confirm your choice.
Once you submit your prompt and a set of lessons, the AI will generate some text. You can accept the text, discard it, or ask the AI to try again.
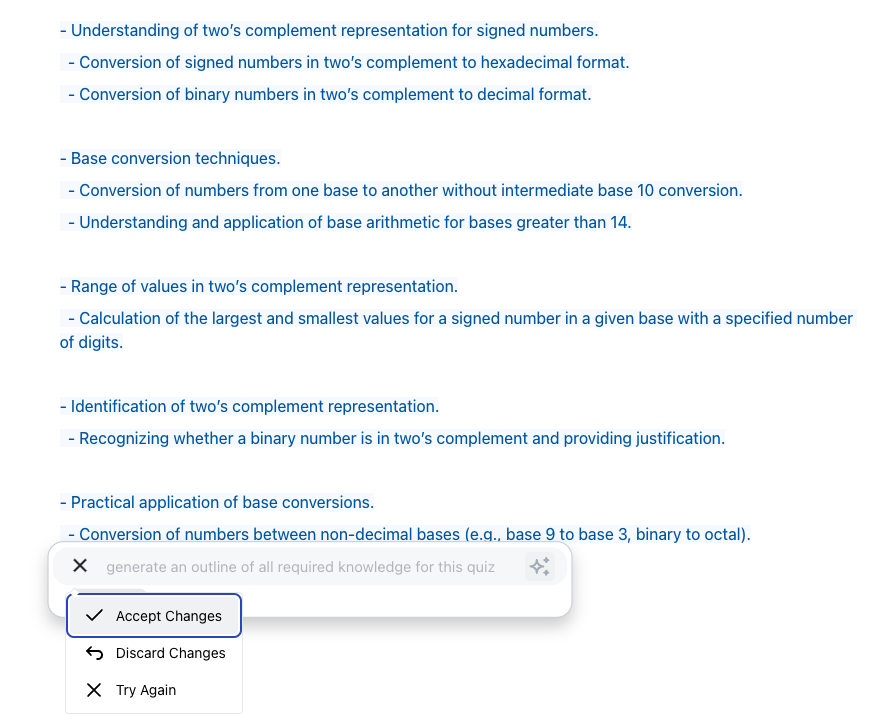
Example of AI generated text asking to outline the materials of a quiz. Once the AI generates text, you have the option to keep the changes, discard them, or ask the AI to try again.