Creating an Activity
Creating an activity is a straightforward process that allows you to tailor learning experiences to your students' needs.
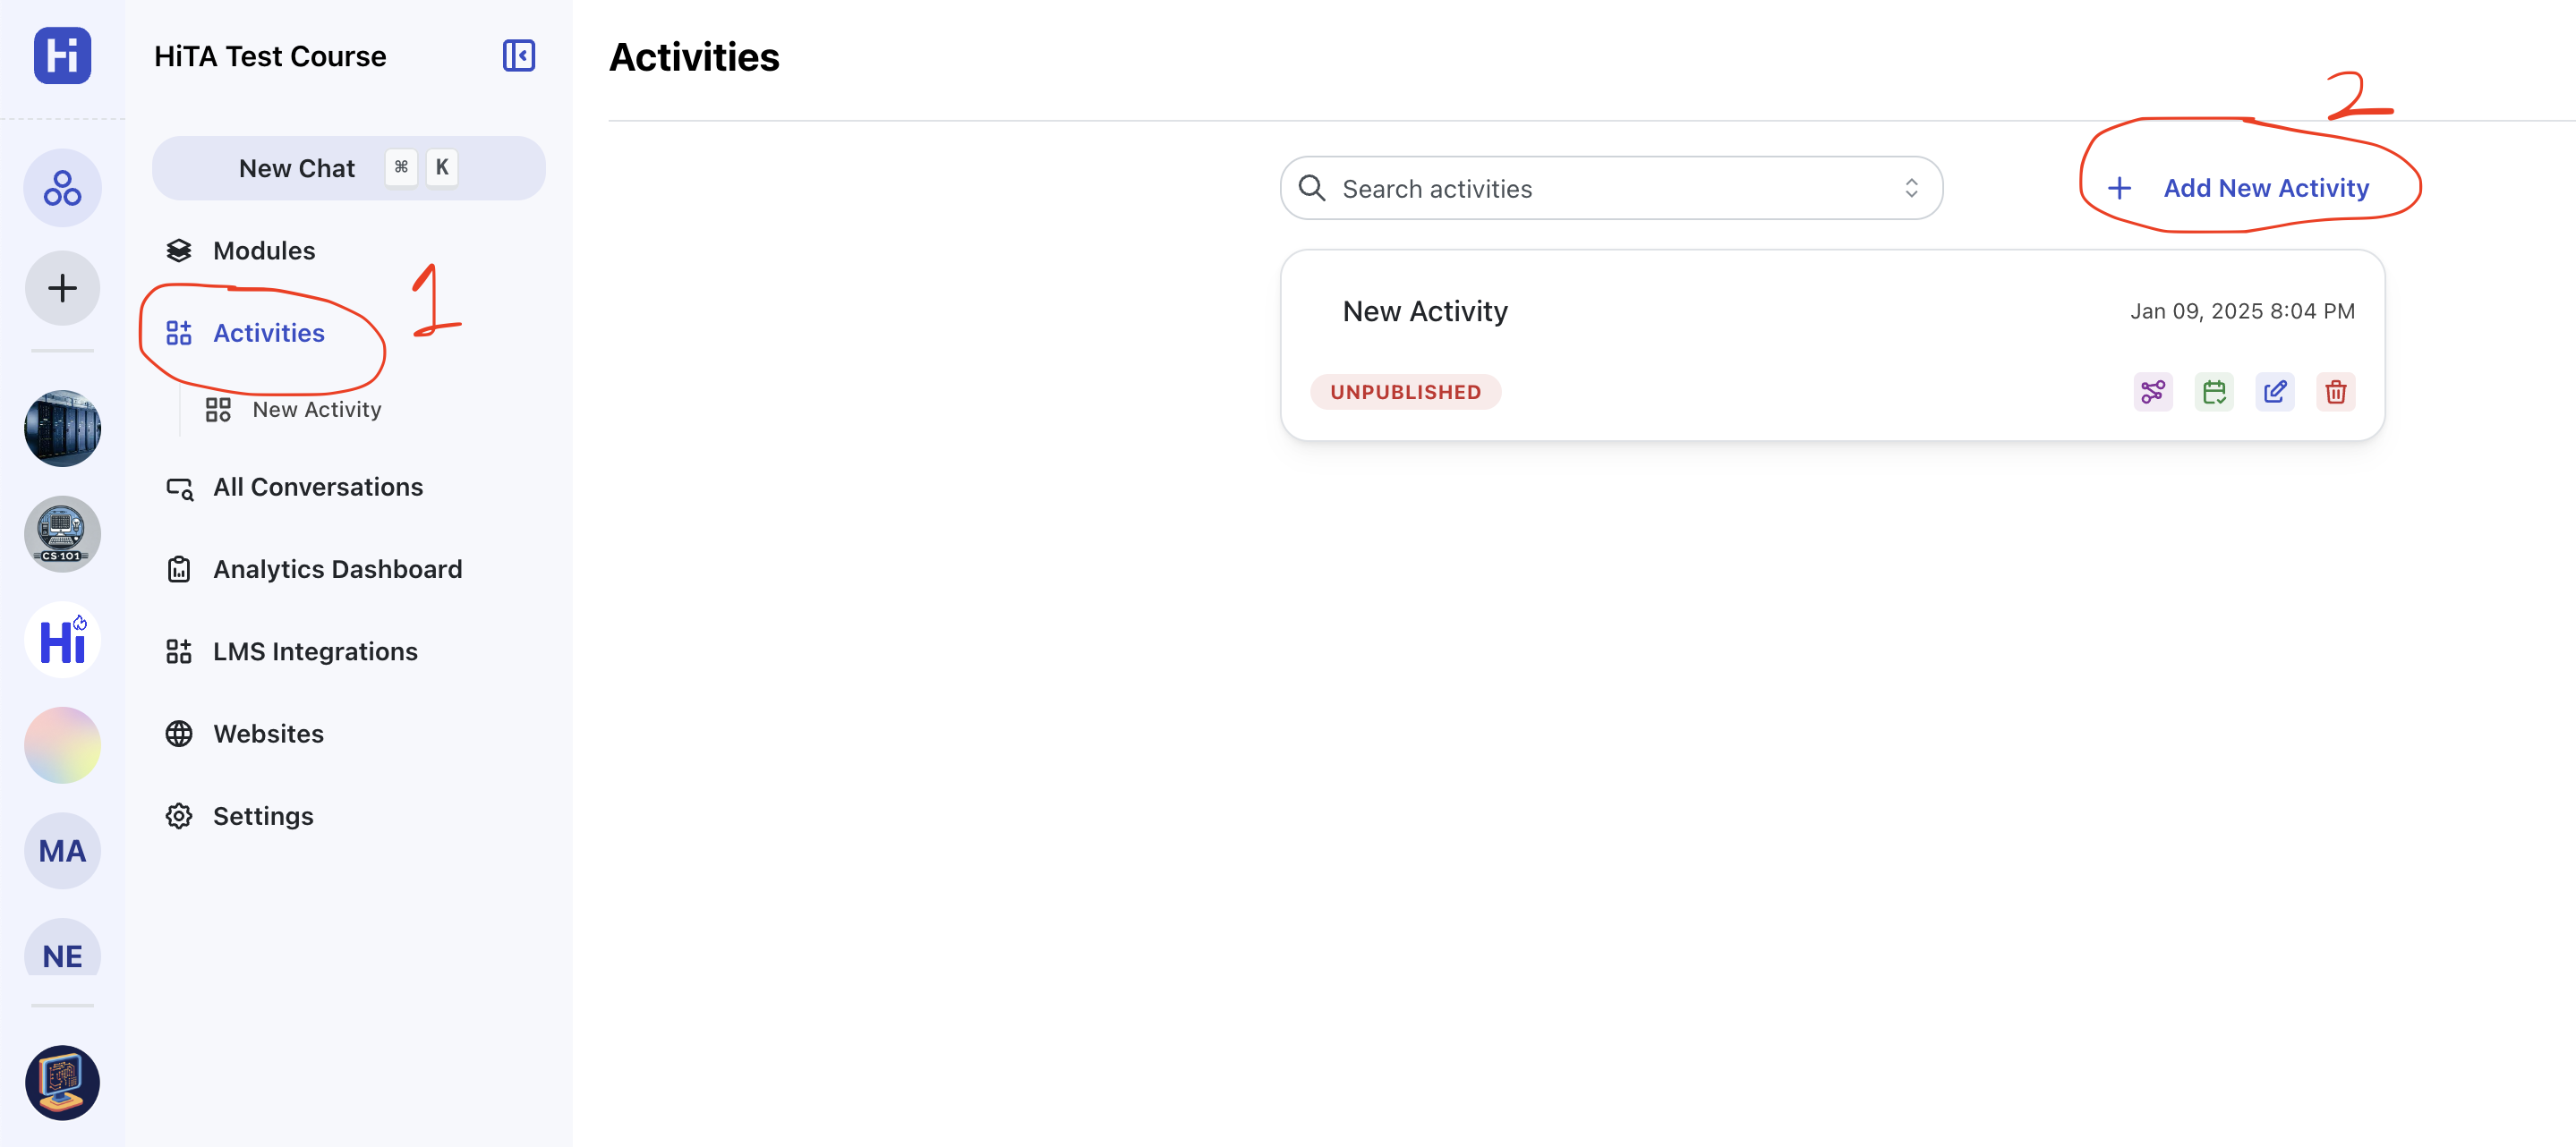
Step 1: Navigate to the Activities Page and Create an Activity
Access the activities outline page by clicking the Activities button in the navbar. From there, click Add New Activity to get started.
Step 2: Fill Out the Activity Discussion Form
The easiest way to create an activity is by using a template. Templates provide pre-filled instructions and goals, saving you time and effort. The available templates include:
- Pre-class Questioning: Encourage students to reflect on topics before class.
- Homework Help: Provide step-by-step guidance for assignments.
- Learn Through Teaching: Reinforce knowledge by having students "teach" the assistant.
- Exam/Quiz Preparation: Help students review and practice for exams.
- Case Study Analysis: Facilitate discussions around real-world scenarios.
Simply select a template, name the activity, and choose any relevant course materials to include. You can also customize the instructions and goals to better fit your objectives.
You can also build one from scratch.
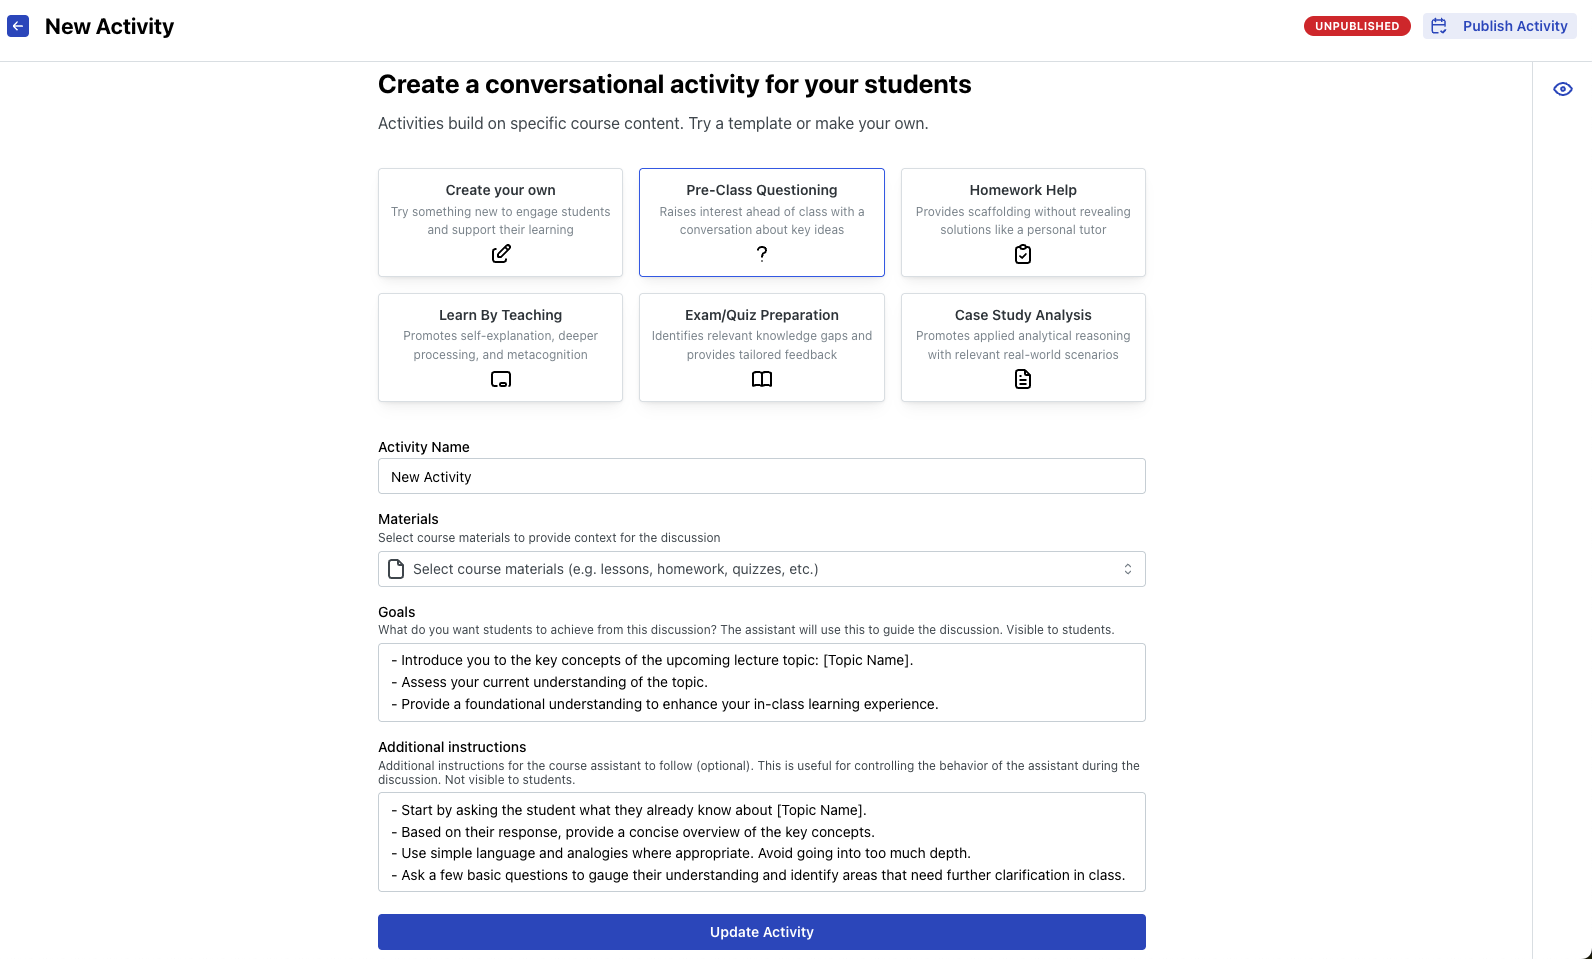
Update button is at the bottom, and the Publish button is on the top.To save your progress, you must click Update Activity at the bottom of the
form.
The activity will not be available to students until you Publish it by
pressing the button located on the page. It will be visible to students once
published, and you can save/update the activity as many times as you would like.
While templates offer a great starting point, you can modify the assistant’s behavior, tone, and scope to better align with your course requirements. Add or remove resources, refine instructions, or set specific activity parameters.
Previewing the Activity
You can test what the activity will look like to a student by pressing the preview icon located on the right side of the page.

Use this feature to refine the goals and instructions of the activity to your
liking. If you want to start fresh from a conversation, press the New Chat
icon on the chat bar at the bottom of the screen.

Step 3: Monitor and Refine
After publishing, monitor student interactions to ensure the activity meets its goals. Use their feedback to make improvements or adapt the activity for future use.
We provide activity analytics for instructors to see at a glance the interactions that the students have had with the published activity. More info can be found on its corresponding documentation page.
Example Workflow
Imagine you’re teaching a topic like Understanding Ecosystems. You could:
- Select the "Case Study Analysis" template.
- Upload a scenario about a local ecosystem facing challenges, such as deforestation or invasive species.
- Define goals like identifying the key components of the ecosystem, analyzing the impact of the challenge, and proposing solutions to restore balance.
- Customize the assistant to ask questions like, "What role do predators and prey play in this ecosystem?" or "How would removing one species affect the overall environment?"
This example engages students in critical thinking, encourages them to draw connections between concepts, and fosters a deeper understanding of environmental science.